3. EntityFramework によるデータベースファースト開発
今回は EntityFramework によって Webアプリケーションの雛形を作成する データベース ファースト開発 について解説します。
EntityFrameworkによるソースコードの自動生成
EntityFramework によって、データベースのテーブル構造を元にアプリケーションの雛形を自動生成することが可能です。
(1) プロジェクトの作成
DrugInfoSearch という名前で新しいプロジェクトを作成します。
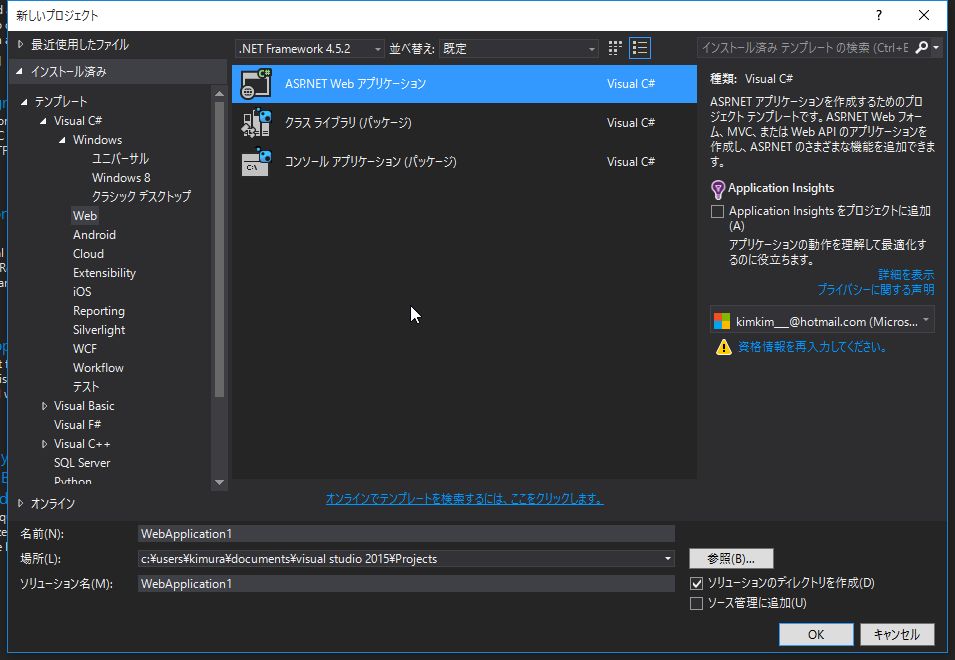
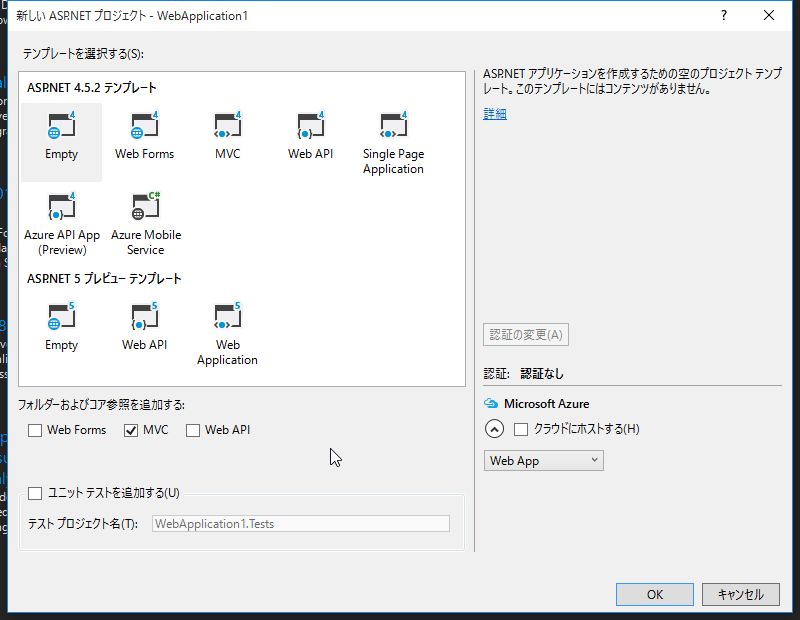
テンプレート は Empty を選択します。MVC にチェックを入れ、OK をクリックします。
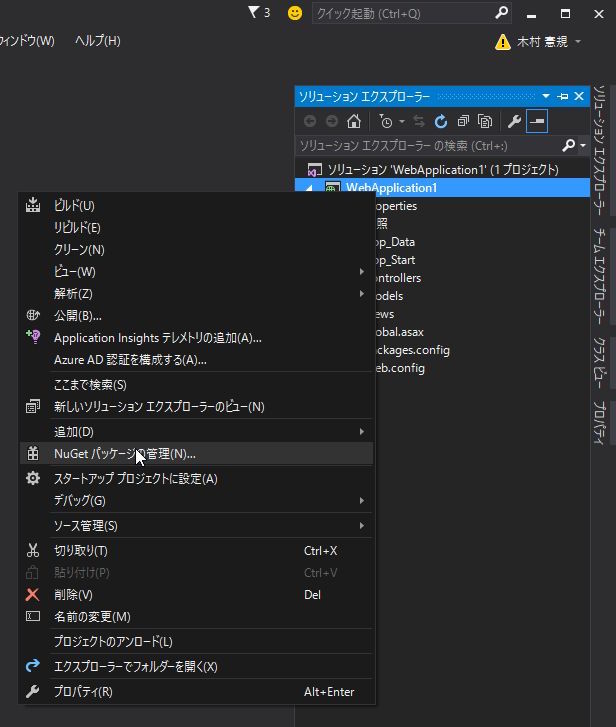
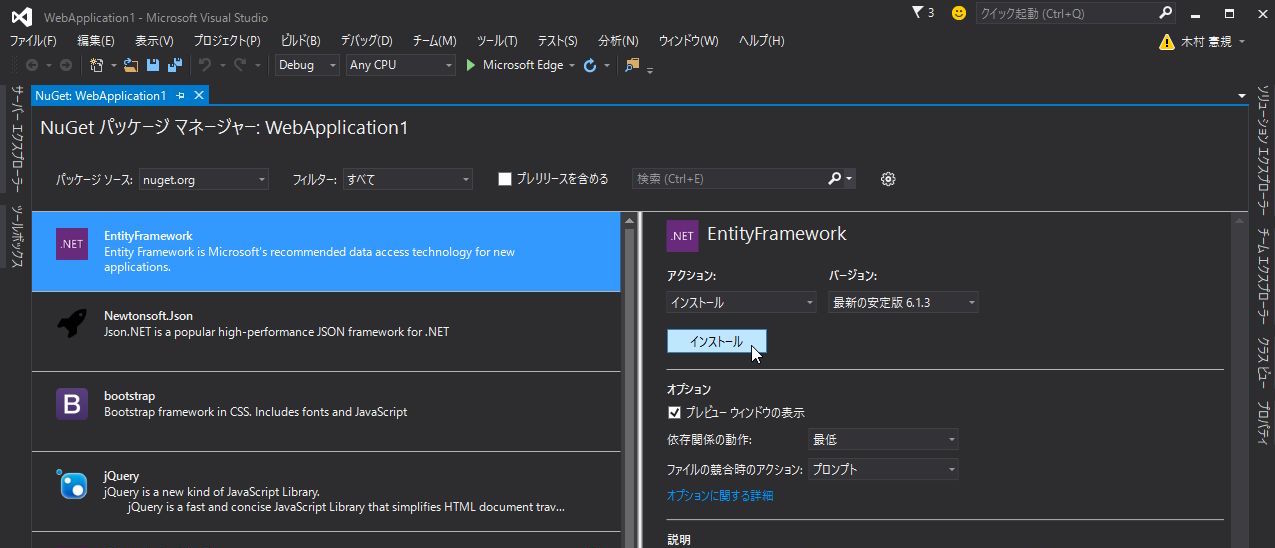
(2) EntityFrameworkのインストール
NuGet で 最新の EntityFramework をインストールします。
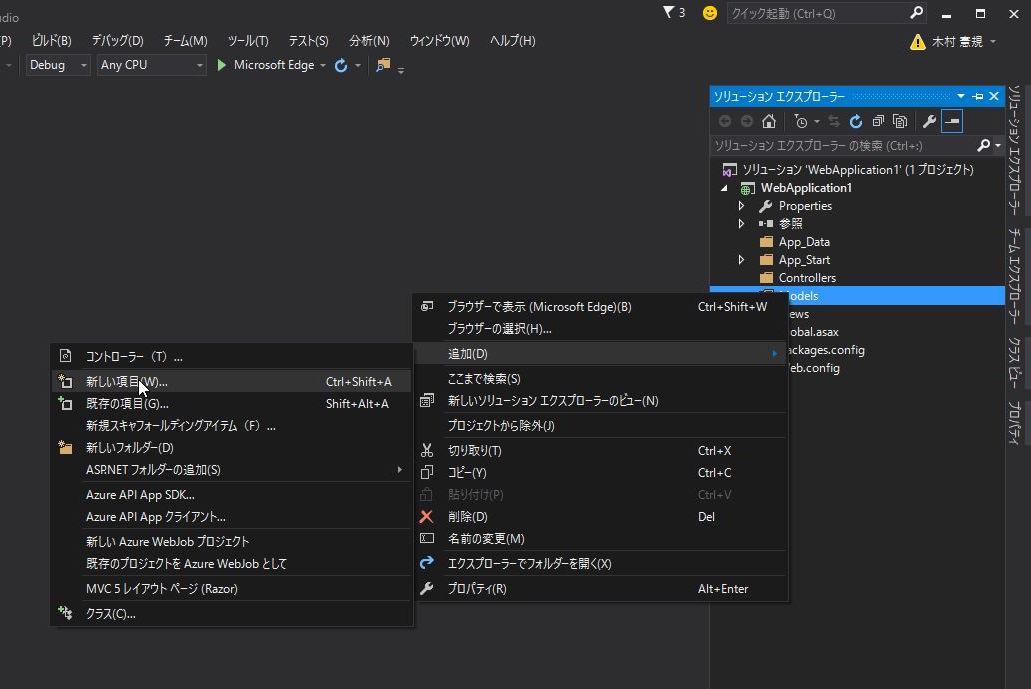
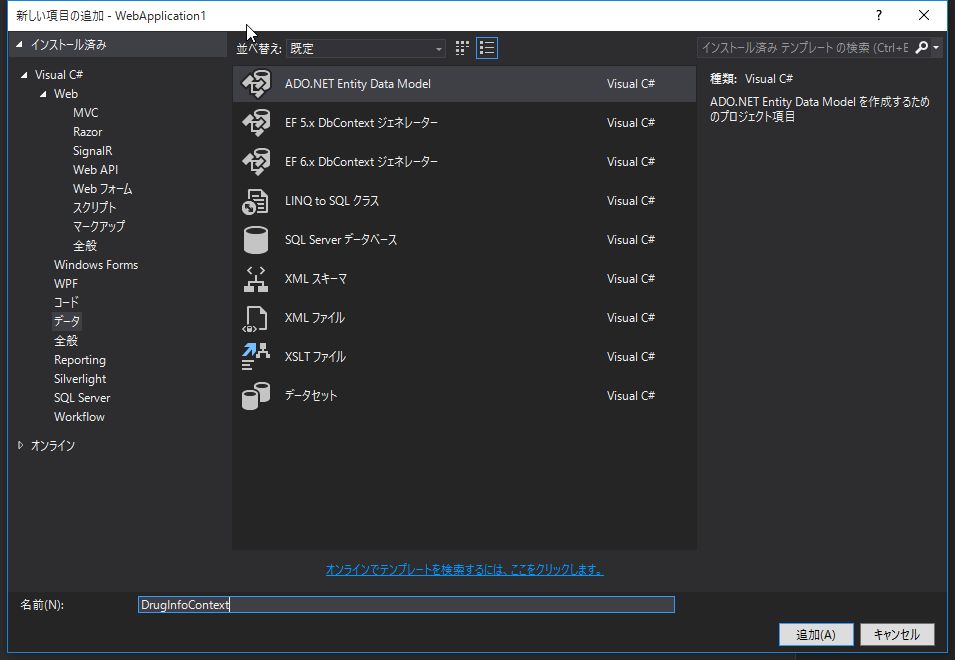
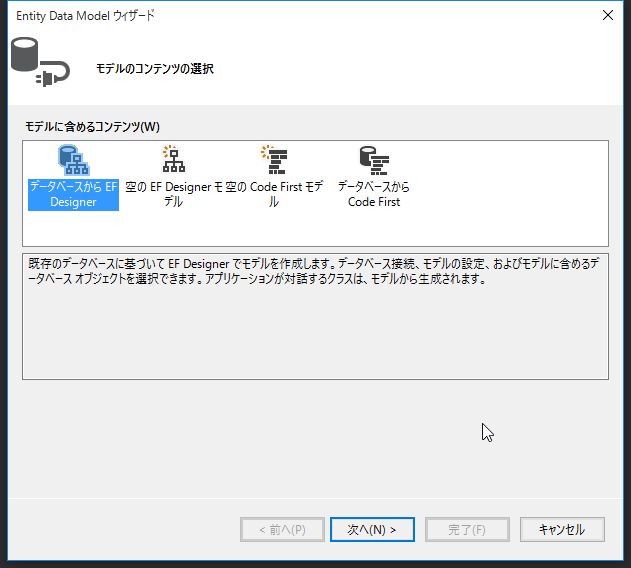
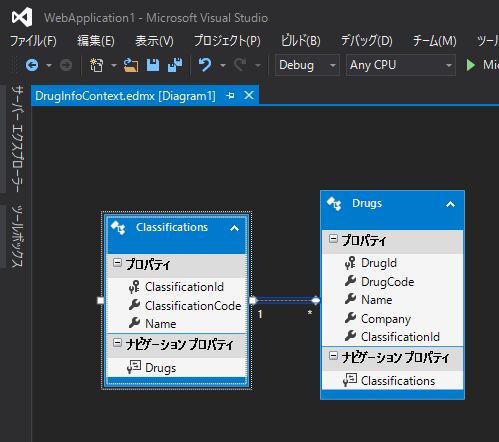
(3) EDMファイルの作成
薬品情報を取得するため、データベースから EDMファイル を生成します。
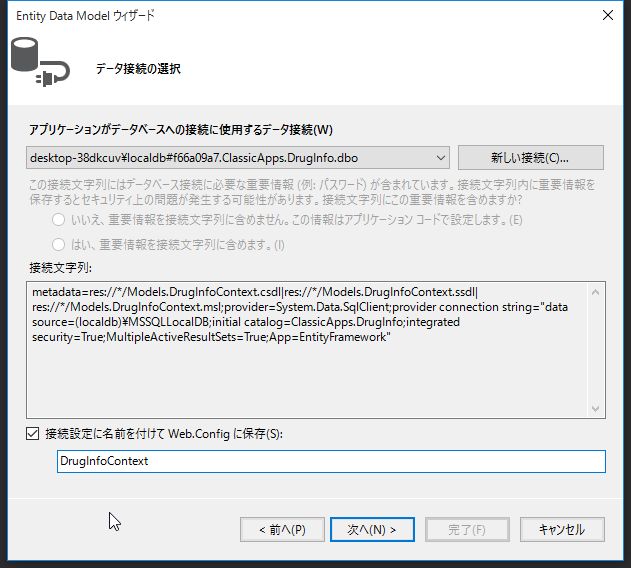

一度ビルドを行ってください。
(ビルドしなかった場合、次の手順でエラーとなります。)

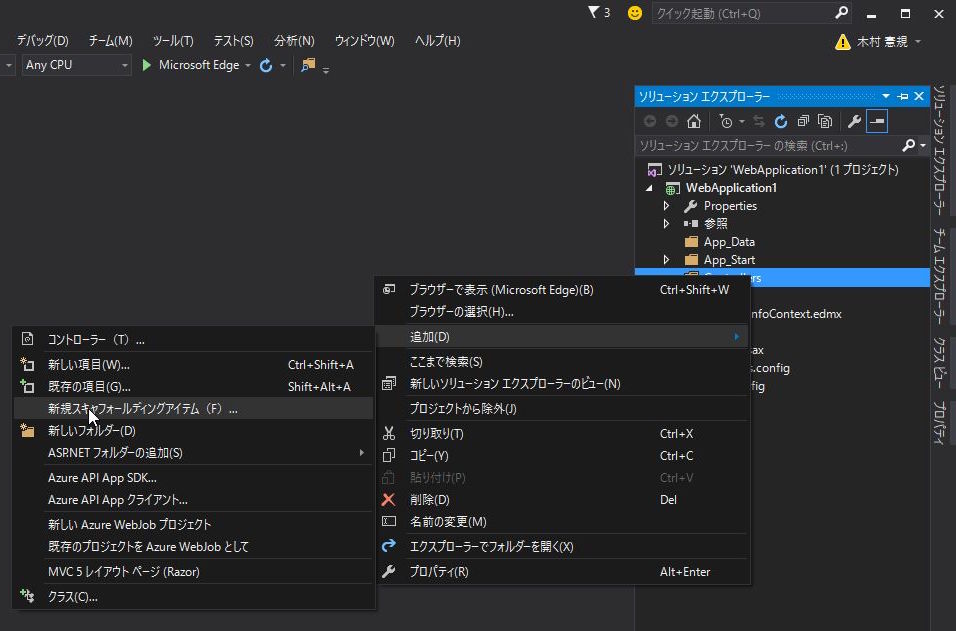
(4) コントローラー、ビューの作成
スキャフォールディング(Scaffolding、「骨組み」「足場」という意味)によって、 Create(作成)、Read(参照)、Update(更新)、Delete(削除)のような定型的なコードの骨組みを自動生成できます。
ソリューション エクスプローラー で Controllers を右クリック -> 追加 -> 新規スキャフォールディングアイテム を選択します。
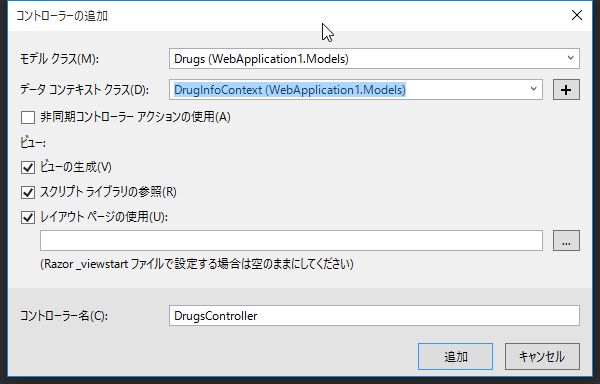
Entity Framework を使用した、ビューがあるMVC5 コントローラー を選択し、追加 をクリックします。
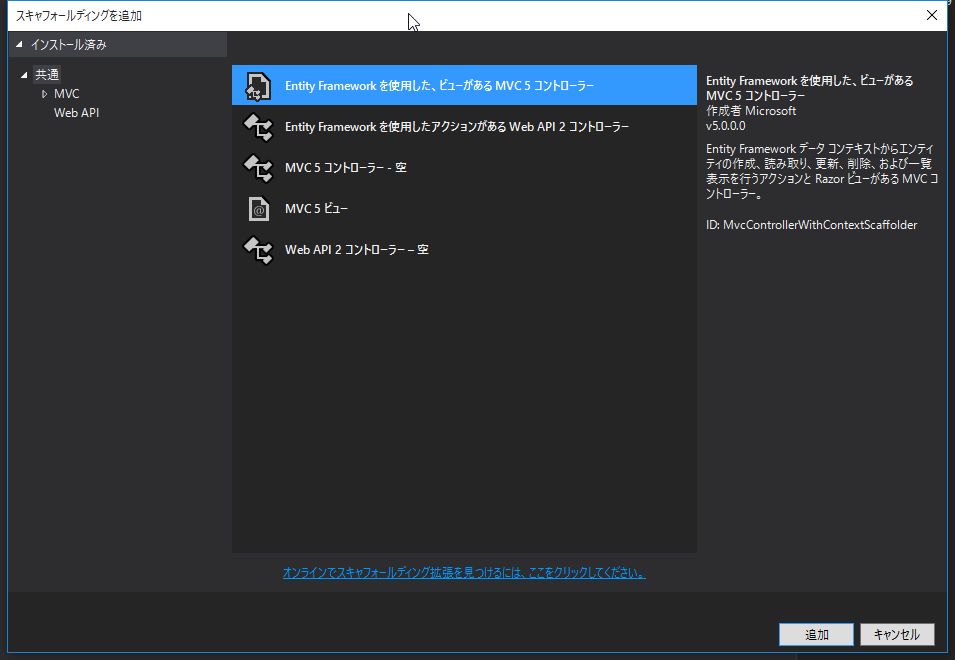
モデル クラス に Drugs 、 データ コンテキスト クラス に DrugInfoContext を選択し、追加 をクリックします。
以下のファイルが生成されます。
- Controllers/DrugsController.cs
- Views/Drugs/
- Create.cshtml
- Delete.cshtml
- Details.cshtml
- Edit.cshtml
- Index.cshtml
- Views/Shared/
- _Layout.cshtml
- _ViewStart.cshtml
後ほど、生成されたファイルの中身について解説します。
(5) ルーティングの設定
App_Start/RouteConfig.cs を修正し、デフォルトページをToDoの一覧ページに変更します。
routes.MapRouteメソッドのdefaults引数にデフォルトの設定を定義します。
using System;
using System.Collections.Generic;
using System.Linq;
using System.Web;
using System.Web.Mvc;
using System.Web.Routing;

namespace WebApplication1
{
    public class RouteConfig
    {
        public static void RegisterRoutes(RouteCollection routes)
        {
            routes.IgnoreRoute("{resource}.axd/{*pathInfo}");

            routes.MapRoute(
                name: "Default",
                url: "{controller}/{action}/{id}",
                defaults: new { controller = "Drugs", action = "Index", id = UrlParameter.Optional }
            );
        }
    }
}
用語解説: ルーティング
ルーティングとは、リクエストURIに応じて処理を受け渡し先を決定することを言います。
ASP.NET MVC ではクライアントからの要求を受け取ると、RouteConfig.cs の内容を元に
呼び出すべきコントローラー/アクションを決定します。
routes.MapRouteメソッドのurl引数がルーティングの定義です。
例えば http://localhost/Drugs/Details/3 というリクエストが来た場合、
url の定義にしたがって DrugsController の Details メソッドに id=3 を引数に与えて呼び出します。
また、 defaults でデフォルトのコントローラー、アクションを指定しているので、http://localhost/ という
リクエストが来た場合は http://localhost/Drugs/Index というリクエストとして処理されます。
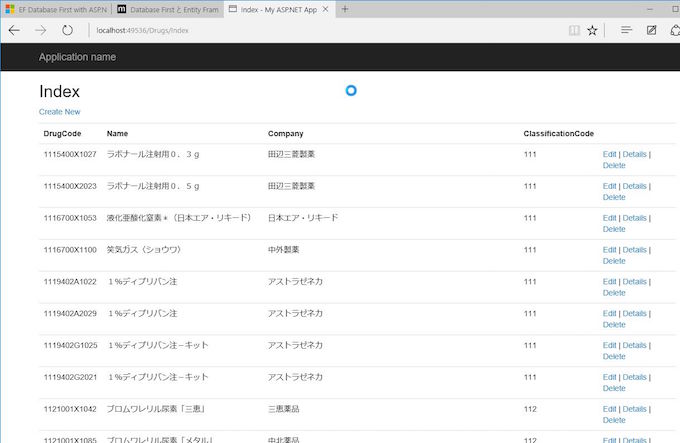
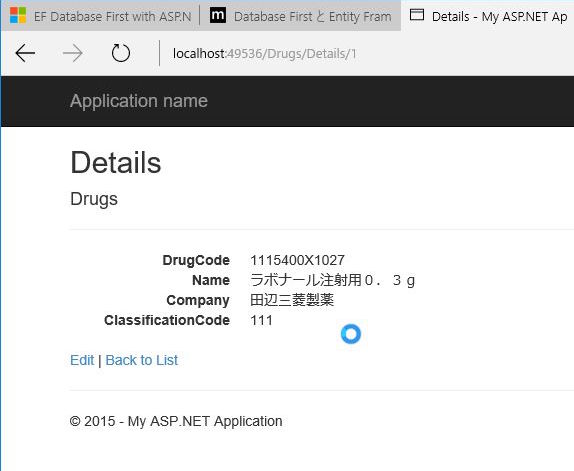
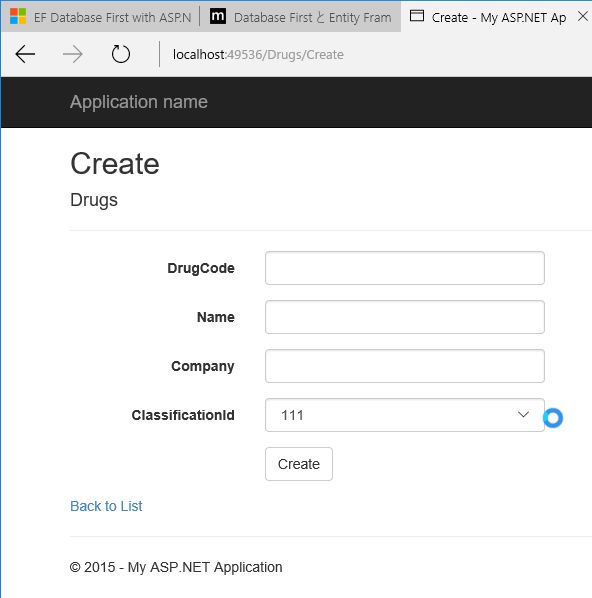
(6) 動作確認
ソースコード解説
Controller
using System;
using System.Collections.Generic;
using System.Data;
using System.Data.Entity;
using System.Linq;
using System.Net;
using System.Web;
using System.Web.Mvc;
using WebApplication1.Models;

namespace WebApplication1.Controllers
{
    public class DrugsController : Controller
    {
        private DrugInfoContext db = new DrugInfoContext();

        // GET: Drugs
        public ActionResult Index()
        {
            var drugs = db.Drugs.Include(d => d.Classifications);
            return View(drugs.ToList());
        }
Indexメソッドの定義です。 View メソッドは
アクションメソッドに対応した View を元に ViewResult (ActionResult を継承した、Viewを表示するためのクラス) を返します。
ここでは、views/Index.cshtml に すべての薬品のListを渡しています。
        // GET: Drugs/Details/5
        public ActionResult Details(int? id)
        {
            if (id == null)
            {
                return new HttpStatusCodeResult(HttpStatusCode.BadRequest);
            }
            Drugs drugs = db.Drugs.Find(id);
            if (drugs == null)
            {
                return HttpNotFound();
            }
            return View(drugs);
        }
Details メソッドの定義です。
int? は int の null許容型
あるいは nullable といいます。
通常の int には null を代入することはできませんが、null許容型であれば
null を代入することが可能です。
RouteConfig.cs の defaults の定義により、idは省略可能です。id が省略された場合、Detailsの引数 id には null が設定されます。
id が null の場合は要求されたURLが正しくないので、BadRequest を返しています。
一致するデータが存在しない場合は Find から null が返ってくるので、NotFound を返しています。
一致するデータが存在すれば、それをViewにセットして返します。
        // GET: Drugs/Create
        public ActionResult Create()
        {
            ViewBag.ClassificationId = new SelectList(db.Classifications, "ClassificationId", "ClassificationCode");
            return View();
        }
Drugs/Create に GET のリクエストが来た場合は View を表示するだけです。
1行目の ViewBag.ClassificationId は、コンボボックスにセットする内容を定義しています。
        // POST: Drugs/Create
        // 過多ポスティング攻撃を防止するには、バインド先とする特定のプロパティを有効にしてください。
        // 詳細については、http://go.microsoft.com/fwlink/?LinkId=317598 を参照してください。
        [HttpPost]
        [ValidateAntiForgeryToken]
        public ActionResult Create([Bind(Include = "DrugId,DrugCode,Name,Company,ClassificationId")] Drugs drugs)
        {
            if (ModelState.IsValid)
            {
                db.Drugs.Add(drugs);
                db.SaveChanges();
                return RedirectToAction("Index");
            }

            ViewBag.ClassificationId = new SelectList(db.Classifications, "ClassificationId", "ClassificationCode", drugs.ClassificationId);
            return View(drugs);
        }
Drugs/Create に POST のリクエストが来た場合、
POST されてきたデータに問題がなければデータベースに登録して Index に戻ります。
ModelState.IsValid は Model にセットされた値が正しいかどうかを判定し、
問題があれば false を返します。
ValidateAntiForgeryToken は クロスサイト・リクエスト・フォージェリ攻撃 を防ぐための記述です。
Bind は POSTされたデータを
Drugsモデルに紐付けます。
ModelState.IsValid は入力チェックがOKかどうかを判定します。
判定には、Modelクラスに設定した [required] などの属性を使用します。
用語解説: クロスサイトリクエストフォージェリ (CSRF)
クロスサイトリクエストフォージェリ(Cross site request forgeries、略記:CSRF、またはXSRF)は、WWW における攻撃手法のひとつである。 具体的な被害としては、掲示板に意図しない書き込みをさせられたり、オンラインショップで買い物をさせられたりするなどが挙げられる。 クロスサイトリクエストフォージェリ
用語解説: Bind と 過多ポスティング攻撃について
ASP.NET MVC では、クライアントからの入力値を自動的にモデルに割り当てる モデルバインド という機能があります。
クライアントからPOSTされてきたデータのkey名を見てモデルに自動的に割り当ててくれるのですが、 セキュリティホールの原因となる場合もあります。
例えば、以下の様な Accountクラスがあった場合を考えます。
- Account.cs
public class Account
{
  public int id { get; set; }
  public string mail { get; set; }
  public string password { get; set; }
  public string role { get; set; }
}
ここで、 role(権限) は管理者のみが設定でき、エンドユーザーからは勝手に編集できないものとします。
(以下の様なViewのイメージ)
- Create.cshtml
<html>
<body>
@using (Html.BeginForm())
{
  @Html.HiddenFor(model => model.id)
  @Html.EditorFor(model => model.mail)
  @Html.EditorFor(model => model.password)
}
</body>
Create.cshtml から POSTされた際に実行されるアクションメソッドを以下のように実装したとします。
- XxxController.cs
[HttpPost]
[ValidateAntiForgeryToken]
public ActionResult Create(Account account)
{
    if (ModelState.IsValid)
    {
        db.Accounts.Add(account);
        db.SaveChanges();
        return RedirectToAction("Index");
    }

    return View(account);
}
Create.cshtmlからPOSTされた場合は id, mail, password のみがセットされてきます。Addでは新しいレコードとしてDBに登録されるので、id は自動的に採番されますので、
プログラマーが期待している動作としては、 POSTされてきた mail と password がDBに登録される
という動作だと思います。
しかし、悪意あるユーザーがPOSTデータを改ざんし、role値を含んだデータを送信すると、
Createメソッドはその値をモデルに割り当ててしまい、結果、意図せず roleに値が設定されてしまいます。
このような攻撃を 過多ポスティング攻撃 といいます。
自動生成された Create メソッドのように Bind を使用して
モデルバインドするプロパティを明示することにより、過多ポスティング攻撃を防止します。
[HttpPost]
[ValidateAntiForgeryToken]
public ActionResult Create([Bind(Include = "id,mail,password")] Account account)
        // GET: Drugs/Edit/5
        public ActionResult Edit(int? id)
        {
            if (id == null)
            {
                return new HttpStatusCodeResult(HttpStatusCode.BadRequest);
            }
            Drugs drugs = db.Drugs.Find(id);
            if (drugs == null)
            {
                return HttpNotFound();
            }
            ViewBag.ClassificationId = new SelectList(db.Classifications, "ClassificationId", "ClassificationCode", drugs.ClassificationId);
            return View(drugs);
        }

        // POST: Drugs/Edit/5
        // 過多ポスティング攻撃を防止するには、バインド先とする特定のプロパティを有効にしてください。
        // 詳細については、http://go.microsoft.com/fwlink/?LinkId=317598 を参照してください。
        [HttpPost]
        [ValidateAntiForgeryToken]
        public ActionResult Edit([Bind(Include = "DrugId,DrugCode,Name,Company,ClassificationId")] Drugs drugs)
        {
            if (ModelState.IsValid)
            {
                db.Entry(drugs).State = EntityState.Modified;
                db.SaveChanges();
                return RedirectToAction("Index");
            }
            ViewBag.ClassificationId = new SelectList(db.Classifications, "ClassificationId", "ClassificationCode", drugs.ClassificationId);
            return View(drugs);
        }
Editメソッドは Details と Create の処理を組み合わせた内容です。
        // GET: Drugs/Delete/5
        public ActionResult Delete(int? id)
        {
            if (id == null)
            {
                return new HttpStatusCodeResult(HttpStatusCode.BadRequest);
            }
            Drugs drugs = db.Drugs.Find(id);
            if (drugs == null)
            {
                return HttpNotFound();
            }
            return View(drugs);
        }

        // POST: Drugs/Delete/5
        [HttpPost, ActionName("Delete")]
        [ValidateAntiForgeryToken]
        public ActionResult DeleteConfirmed(int id)
        {
            Drugs drugs = db.Drugs.Find(id);
            db.Drugs.Remove(drugs);
            db.SaveChanges();
            return RedirectToAction("Index");
        }
削除時の流れは以下のようになります。
Delete/{id}にリクエスト (Get)DeleteメソッドからDelete.cshtmlが返される
Deleteボタンをクリック ->DeleteにPOSTされる- 該当IDの項目を検索し削除
Indexを返す
        protected override void Dispose(bool disposing)
        {
            if (disposing)
            {
                db.Dispose();
            }
            base.Dispose(disposing);
        }
    }
}
Dispose は終了処理です。
db.Dispose() で保持している Context を開放しています。
View
Views/_ViewStart.cshtml
各Viewに共通の処理を書くことができます。
@{
    Layout = "~/Views/Shared/_Layout.cshtml";
}
ここでは、レイアウトファイルを指定しています。
Views/Shared/_Layout.cshtml
各Viewで共通するレイアウトになります。
画面上部のメニューバーとフッターを定義しています。
また、各画面で使用するcss, javascriptの読み込みを行っています。
<!DOCTYPE html>
<html>
<head>
<meta charset="utf-8" />
<meta name="viewport" content="width=device-width, initial-scale=1.0">
<title>@ViewBag.Title - My ASP.NET Application</title>
<link href="~/Content/Site.css" rel="stylesheet" type="text/css" />
<link href="~/Content/bootstrap.min.css" rel="stylesheet" type="text/css" />
<script src="~/Scripts/modernizr-2.6.2.js"></script>
</head>
<body>
<div class="navbar navbar-inverse navbar-fixed-top">
<div class="container">
<div class="navbar-header">
<button type="button" class="navbar-toggle" data-toggle="collapse" data-target=".navbar-collapse">
<span class="icon-bar"></span>
<span class="icon-bar"></span>
<span class="icon-bar"></span>
</button>
@Html.ActionLink("Application name", "Index", "Home", new { area = "" }, new { @class = "navbar-brand" })
</div>
<div class="navbar-collapse collapse">
<ul class="nav navbar-nav">
</ul>
</div>
</div>
</div>
<div class="container body-content">
@RenderBody()
<hr />
<footer>
<p>© @DateTime.Now.Year - My ASP.NET Application</p>
</footer>
</div>
<script src="~/Scripts/jquery-1.10.2.min.js"></script>
<script src="~/Scripts/bootstrap.min.js"></script>
</body>
</html>
ViewBag はコントローラとビューの間でデータをやりとりする際に使用します。
@Html.ActionLink() はリンクを生成します。
上記の場合は HomeControllerのIndexアクションへのリンクが生成されます。
@RenderBody() の箇所に各Viewの内容が埋め込まれます。
用語解説: bootstrap
BootstrapはWebサイトやWebアプリケーションを作成するフリーソフトウェアツール集である。 タイポグラフィ、フォーム、ボタン、ナビゲーション、その他構成要素やJavaScript用拡張などがHTML及びCSSベースのデザインテンプレートとして用意されている。
用語解説: modernizr
HTML5やCSS3では、HTMLで表現できることが大幅に強化されましたが、 HTML5/CSS3機能の実装状況はブラウザーごとに異なるため、 HTML5/CSS3の仕様として定義されているからといってそのまま使えるわけではありません。
modernizr はブラウザーで使用可能な機能をCSSやJavaScriptから確認できるようにする機能を提供します。
用語解説: jQuery
John Resig(ジョン・レッシグ)氏によって開発/公開されたJavaScript用のライブラリです。
ライセンスは MIT Licenseとなっており、ライブラリの著作権表示を消さなければ
商用・非商用を問わず、誰でも自由に利用することができます。
機能・特徴として、以下の点が挙げられます。
- ブラウザに依存しない
- DOM 選択、操作を容易に記述できる
- Ajax 操作を容易に記述できる
拡張性 (プラグイン機構) がある
Views/Drugs/Index.cshtml
@model IEnumerable<WebApplication1.Models.Drugs>

@{
    ViewBag.Title = "Index";
}

<h2>Index</h2>

<p>
    @Html.ActionLink("Create New", "Create")
</p>
<table class="table">
    <tr>
        <th>
            @Html.DisplayNameFor(model => model.DrugCode)
        </th>
        <th>
            @Html.DisplayNameFor(model => model.Name)
        </th>
        <th>
            @Html.DisplayNameFor(model => model.Company)
        </th>
        <th>
            @Html.DisplayNameFor(model => model.Classifications.ClassificationCode)
        </th>
        <th></th>
    </tr>

@foreach (var item in Model) {
    <tr>
        <td>
            @Html.DisplayFor(modelItem => item.DrugCode)
        </td>
        <td>
            @Html.DisplayFor(modelItem => item.Name)
        </td>
        <td>
            @Html.DisplayFor(modelItem => item.Company)
        </td>
        <td>
            @Html.DisplayFor(modelItem => item.Classifications.ClassificationCode)
        </td>
        <td>
            @Html.ActionLink("Edit", "Edit", new { id=item.DrugId }) |
            @Html.ActionLink("Details", "Details", new { id=item.DrugId }) |
            @Html.ActionLink("Delete", "Delete", new { id=item.DrugId })
        </td>
    </tr>
}

</table>
コントローラーのアクションメソッドにて Viewメソッド で引き渡されたデータを受け取るには、
@modelディレクティブ を使用します。
@model WebApplication1.Models.Drugs

@{
    ViewBag.Title = "Edit";
}

<h2>Edit</h2>


@using (Html.BeginForm())
{
    @Html.AntiForgeryToken()

    <div class="form-horizontal">
        <h4>Drugs</h4>
        <hr />
        @Html.ValidationSummary(true, "", new { @class = "text-danger" })
        @Html.HiddenFor(model => model.DrugId)

        <div class="form-group">
            @Html.LabelFor(model => model.DrugCode, htmlAttributes: new { @class = "control-label col-md-2" })
            <div class="col-md-10">
                @Html.EditorFor(model => model.DrugCode, new { htmlAttributes = new { @class = "form-control" } })
                @Html.ValidationMessageFor(model => model.DrugCode, "", new { @class = "text-danger" })
            </div>
        </div>

        <div class="form-group">
            @Html.LabelFor(model => model.Name, htmlAttributes: new { @class = "control-label col-md-2" })
            <div class="col-md-10">
                @Html.EditorFor(model => model.Name, new { htmlAttributes = new { @class = "form-control" } })
                @Html.ValidationMessageFor(model => model.Name, "", new { @class = "text-danger" })
            </div>
        </div>

        <div class="form-group">
            @Html.LabelFor(model => model.Company, htmlAttributes: new { @class = "control-label col-md-2" })
            <div class="col-md-10">
                @Html.EditorFor(model => model.Company, new { htmlAttributes = new { @class = "form-control" } })
                @Html.ValidationMessageFor(model => model.Company, "", new { @class = "text-danger" })
            </div>
        </div>

        <div class="form-group">
            @Html.LabelFor(model => model.ClassificationId, "ClassificationId", htmlAttributes: new { @class = "control-label col-md-2" })
            <div class="col-md-10">
                @Html.DropDownList("ClassificationId", null, htmlAttributes: new { @class = "form-control" })
                @Html.ValidationMessageFor(model => model.ClassificationId, "", new { @class = "text-danger" })
            </div>
        </div>

        <div class="form-group">
            <div class="col-md-offset-2 col-md-10">
                <input type="submit" value="Save" class="btn btn-default" />
            </div>
        </div>
    </div>
}

<div>
    @Html.ActionLink("Back to List", "Index")
</div>

<script src="~/Scripts/jquery-1.10.2.min.js"></script>
<script src="~/Scripts/jquery.validate.min.js"></script>
<script src="~/Scripts/jquery.validate.unobtrusive.min.js"></script>
HTMLヘルパーで入力フォームを生成しています。
@Html.AntiForgeryToken()は CSRF対策の<hidden>タグを埋め込みます。@Html.ValidationSummary(): 入力検証(validation)の結果で返されるメッセージが入ります。@Html.HiddenFor():hiddenタグを生成します。@Html.LabelFor():labelタグを生成します。@Html.EditorFor(): モデル定義に応じたタグを生成します。@Html.ValidationMessageFor(): 各エディタでのvalidationのエラーメッセージが表示されます。
ASP.NET MVC 5 と Entity Framework 6 を活用して、非常にシンプルなWebアプリケーションを
簡単・簡潔に作成する手順について解説しました。
ほとんどコーディングを行わずに、基本的な CRUD を行うアプリケーションが作成できることに驚かれたと思います。