4. 薬品情報検索システムの開発
前回作成した DrugInfoSearch に手を加え、 検索機能と薬効分類のメンテナンス機能を作成します。
検索画面の追加
薬品名と薬効分類で絞込を行う機能を追加します。
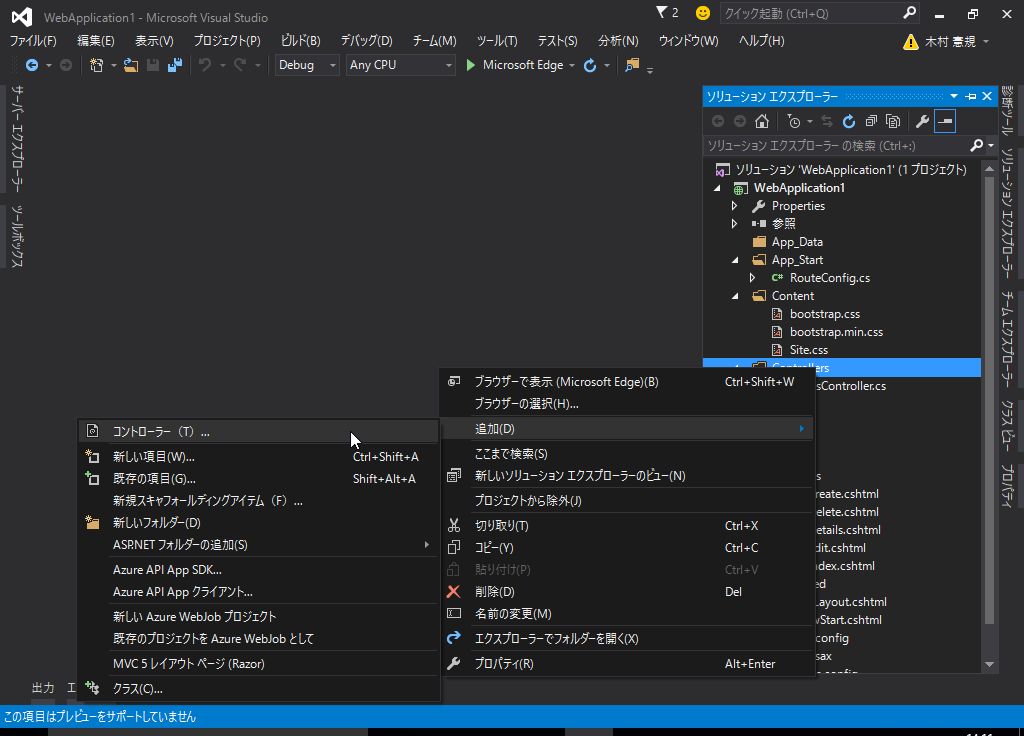
コントローラの追加
ソリューション エクスプローラー で Controllers を右クリックし、追加 -> コントローラー を選択します。
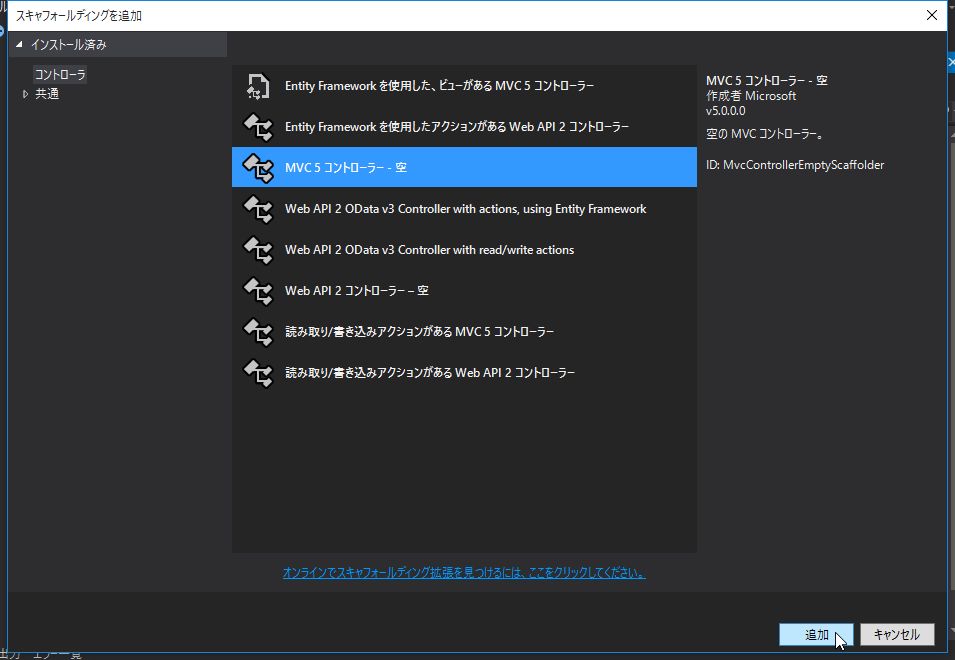
MVC5 コントローラー - 空 を選択します。
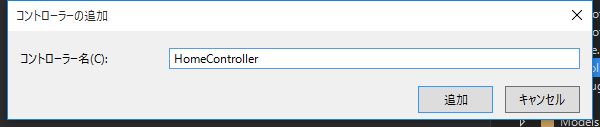
名前を HomeController とします。
ViewModelの作成
これまではデータベースのテーブル構造から自動生成されたモデルクラスを使用してきましたが、 自動生成されたモデルクラスでは検索条件を格納するのに適切なプロパティがないために データの受け渡しが上手くできません。
このような場合、View で扱うデータを定義する ViewModel を作成します。
ソリューション エクスプローラー で Models を右クリックし、追加 -> クラス を選択します。
クラス名を SearchViewModel とします。
Models/SearchViewModel.cs
using System.Collections.Generic;
using System.ComponentModel;

namespace WebApplication1.Models
{
    public class SearchViewModel
    {
        [DisplayName("薬品名")]
        public string DrugName { get; set; }

        [DisplayName("薬効分類")]
        public int ClassificationId { get; set; }

        public List<Drugs> Drugs { get; set; }
    }
}
Index アクションメソッド (GET/POST) の作成
Index の GET, POST に対応するアクションメソッドを実装します。
Controllers/HomeController.cs
using System.Linq;
using System.Web.Mvc;
using WebApplication1.Models;

namespace WebApplication1.Controllers
{
    public class HomeController : Controller
    {
        private DrugInfoContext db = new DrugInfoContext();

        // GET: Home
        public ActionResult Index()
        {
            this.SetClassificationItems();

            // Viewでの処理を簡単にするため、空のViewModelを渡す
            var model = new SearchViewModel();
            return View(model);
        }

        // POST: Home
        [HttpPost]
        [ValidateAntiForgeryToken]
        public ActionResult Index([Bind(Include = "DrugName,ClassificationId")] SearchViewModel model)
        {
            if (ModelState.IsValid)
            {
                // 検索処理
                var list = db.Drugs.Where(item =>
                    (string.IsNullOrEmpty(model.DrugName) || item.Name.Contains(model.DrugName))
                    && (model.ClassificationId == 0 || item.ClassificationId == model.ClassificationId)).ToList();
                model.Drugs = list;
            }
            this.SetClassificationItems();
            return View(model);
        }

        /// <summary>
        /// ViewBagにコンボボックスの項目をセット
        /// </summary>
        private void SetClassificationItems()
        {
            var list = db.Classifications.Select(item => new SelectListItem
            {
                Text = item.ClassificationCode + ":" + item.Name,
                Value = item.ClassificationId.ToString()
            }).ToList();

            // 先頭にブランクを挿入
            list.Insert(0, new SelectListItem {
                Text = string.Empty,
                Value = "0"
            });

            ViewBag.ClassificationId = list;
        }
    }
}
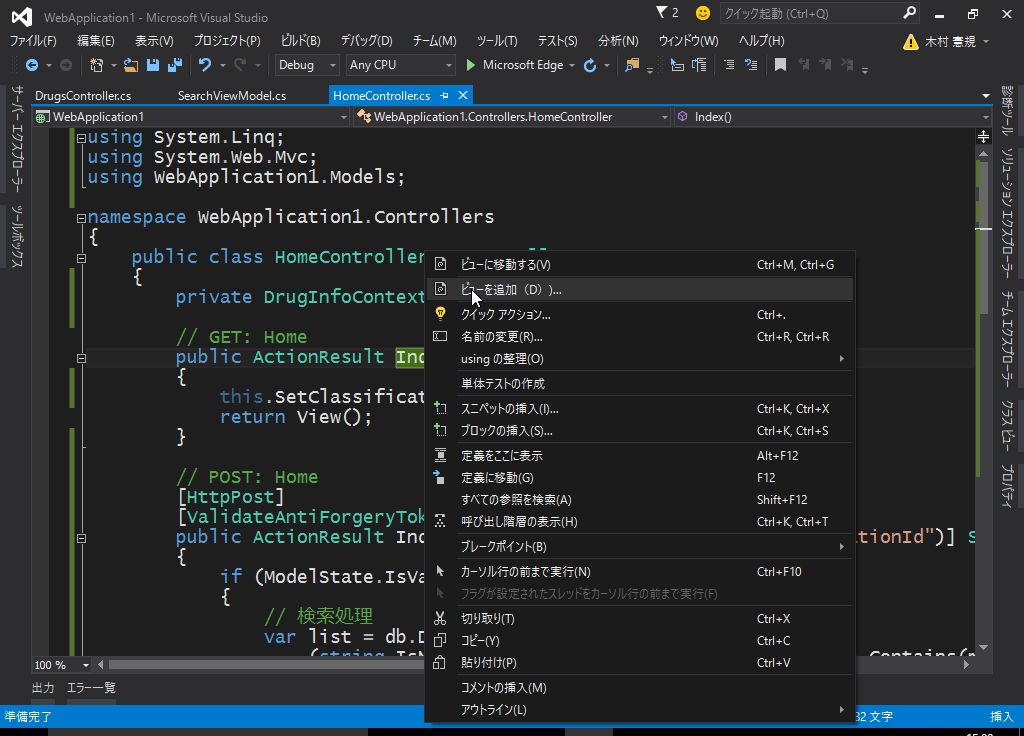
Index Viewの作成
HomeController の Index メソッドを右クリックし、Viewの追加 を選択します。
ビューの追加 で以下のように入力し、追加 をクリックします。

- モデル: SearchViewModel
- テンプレート: Create
- データ コンテキスト クラス: (空)
Views/Home/Index.cshtml
@model WebApplication1.Models.SearchViewModel

@{
    ViewBag.Title = "Index";
}

@using (Html.BeginForm())
{
    @Html.AntiForgeryToken()

    <div class="form-horizontal">
        <h4>SearchViewModel</h4>
        <hr />
        @Html.ValidationSummary(true, "", new { @class = "text-danger" })
        <div class="form-group">
            @Html.LabelFor(model => model.DrugName, htmlAttributes: new { @class = "control-label col-md-2" })
            <div class="col-md-10">
                @Html.EditorFor(model => model.DrugName, new { htmlAttributes = new { @class = "form-control" } })
                @Html.ValidationMessageFor(model => model.DrugName, "", new { @class = "text-danger" })
            </div>
        </div>

        <div class="form-group">
            @Html.LabelFor(model => model.ClassificationId, htmlAttributes: new { @class = "control-label col-md-2" })
            <div class="col-md-10">
                @Html.DropDownList("ClassificationId", null, htmlAttributes: new { @class = "form-control" })
                @Html.ValidationMessageFor(model => model.ClassificationId, "", new { @class = "text-danger" })
            </div>
        </div>

        <div class="form-group">
            <div class="col-md-offset-2 col-md-10">
                <input type="submit" value="検索" class="btn btn-default" />
            </div>
        </div>
    </div>
}

@Html.ActionLink("Create New", "Create", new { Controller = "Drugs" })

@{
    // ヘッダーの描画で使用
    var drug = new WebApplication1.Models.Drugs();
}

@if (Model.Drugs != null)
{
<table class="table">
    <tr>
        <th>
            @Html.DisplayNameFor(model => drug.DrugCode)
        </th>
        <th>
            @Html.DisplayNameFor(model => drug.Name)
        </th>
        <th>
            @Html.DisplayNameFor(model => drug.Company)
        </th>
        <th>
            @Html.DisplayNameFor(model => drug.Classifications.ClassificationCode)
        </th>
        <th></th>
    </tr>

    @foreach (var item in Model.Drugs)
    {
        <tr>
            <td>
                @Html.DisplayFor(modelItem => item.DrugCode)
            </td>
            <td>
                @Html.DisplayFor(modelItem => item.Name)
            </td>
            <td>
                @Html.DisplayFor(modelItem => item.Company)
            </td>
            <td>
                @Html.DisplayFor(modelItem => item.Classifications.ClassificationCode)
            </td>
            <td>
                @Html.ActionLink("Details", "Details", new { id = item.DrugId, Controller = "Drugs" })
                @if (string.IsNullOrEmpty(item.DrugCode))
                {
                    @Html.Raw("|")
                    @Html.ActionLink("Edit", "Edit", new { id = item.DrugId, Controller = "Drugs" })
                    @Html.Raw("|")
                    @Html.ActionLink("Delete", "Delete", new { id = item.DrugId, Controller = "Drugs" })
                }
            </td>
        </tr>
    }
</table>
}

    <script src="~/Scripts/jquery-1.10.2.min.js"></script>
    <script src="~/Scripts/jquery.validate.min.js"></script>
    <script src="~/Scripts/jquery.validate.unobtrusive.min.js"></script>
検索項目の薬効分類はコンボボックスとしたいので、 @Html.DropDownList を使用します。
Createへのリンクを追加します。 異なるコントローラーのアクションメソッドに遷移するリンクを作成する場合、以下のように記述します。
@Html.ActionLink("Create New", "Create", new { Controller = "Drugs" })
薬品コードが空でない薬品については編集・削除不可としますので
Edit、Delete のリンクを表示しないようにします。
Drugs/Indexの変更
薬品コードが空でない薬品については編集・削除不可としますので
Edit、Delete のリンクを表示しないように修正します。
Views/Drugs/Index.cshtml
:
<td>
    @Html.ActionLink("Details", "Details", new { id = item.DrugId })
    @if (string.IsNullOrEmpty(item.DrugCode))
    {
        @Html.Raw("|")
        @Html.ActionLink("Edit", "Edit", new { id=item.DrugId })
        @Html.Raw("|")
        @Html.ActionLink("Delete", "Delete", new { id=item.DrugId })
    }
</td>
:
Drugs/Detailsの変更
薬品コードが空でない薬品については編集・削除不可としますので
Edit のリンクを表示しないように修正します。
Views/Drugs/Details.cshtml
<p>
    @if (string.IsNullOrEmpty(Model.DrugCode)) {
        @Html.ActionLink("Edit", "Edit", new { id = Model.DrugId })
        @Html.Raw("|")
    }
    @Html.ActionLink("Back to List", "Index")
</p>
Drugs/Createの変更
薬品コードは入力できないように、該当箇所をコメントアウトし、hiddenタグに置き換えます。
Views/Drugs/Create.cshtml
@*
<div class="form-group">
    @Html.LabelFor(model => model.DrugCode, htmlAttributes: new { @class = "control-label col-md-2" })
    <div class="col-md-10">
        @Html.EditorFor(model => model.DrugCode, new { htmlAttributes = new { @class = "form-control" } })
        @Html.ValidationMessageFor(model => model.DrugCode, "", new { @class = "text-danger" })
    </div>
</div>
*@
@Html.HiddenFor(model => model.DrugCode)
Drugs/Editの変更
薬品コードが空でない薬品については変更不可とします。 URLを直接叩いて変更しようとするユーザーが存在するかもしれませんので、その対応を行います。
Controllerの変更
薬品コードが空でない薬品が選択された場合、BadRequestとして処理します。
Controllers/DrugsController.cs
// GET: Drugs/Edit/5
public ActionResult Edit(int? id)
{
    if (id == null)
    {
        return new HttpStatusCodeResult(HttpStatusCode.BadRequest);
    }
    Drugs drugs = db.Drugs.Find(id);
    if (drugs == null)
    {
        return HttpNotFound();
    }
    // 薬品コードが登録されている薬品は編集不可
    if (!string.IsNullOrEmpty(drugs.DrugCode))
    {
        return new HttpStatusCodeResult(HttpStatusCode.BadRequest);
    }

    ViewBag.ClassificationId = db.Classifications.Select(item => new SelectListItem
    {
        Text = item.ClassificationCode + ":" + item.Name,
        Value = item.ClassificationId.ToString(),
        Selected = item.ClassificationId == drugs.ClassificationId
    });

    return View(drugs);
}
Viewの変更
薬品コードは入力できないように、該当箇所をコメントアウトし、hiddenタグに置き換えます。
Views/Drugs/Edit.cshtml
@*
<div class="form-group">
    @Html.LabelFor(model => model.DrugCode, htmlAttributes: new { @class = "control-label col-md-2" })
    <div class="col-md-10">
        @Html.EditorFor(model => model.DrugCode, new { htmlAttributes = new { @class = "form-control" } })
        @Html.ValidationMessageFor(model => model.DrugCode, "", new { @class = "text-danger" })
    </div>
</div>
*@
@Html.HiddenFor(model => model.DrugCode)
Deleteの変更
薬品コードが空でない薬品については削除不可とします。 URLを直接叩いて削除しようとするユーザーが存在するかもしれませんので、その対応を行います。
薬品コードが空でない薬品が選択された場合、BadRequestとして処理します。
Controllers/DrugsController.cs
// GET: Drugs/Delete/5
public ActionResult Delete(int? id)
{
    if (id == null)
    {
        return new HttpStatusCodeResult(HttpStatusCode.BadRequest);
    }
    Drugs drugs = db.Drugs.Find(id);
    if (drugs == null)
    {
        return HttpNotFound();
    }
    // 薬品コードが登録されている薬品は編集不可
    if (!string.IsNullOrEmpty(drugs.DrugCode))
    {
        return new HttpStatusCodeResult(HttpStatusCode.BadRequest);
    }

    return View(drugs);
}
ルーティングの変更
/Home/Index がデフォルトとなるようにルーティングを変更します。
App_Start/RouteConfig.cs
using System;
using System.Collections.Generic;
using System.Linq;
using System.Web;
using System.Web.Mvc;
using System.Web.Routing;

namespace WebApplication1
{
    public class RouteConfig
    {
        public static void RegisterRoutes(RouteCollection routes)
        {
            routes.IgnoreRoute("{resource}.axd/{*pathInfo}");

            routes.MapRoute(
                name: "Default",
                url: "{controller}/{action}/{id}",
                defaults: new { controller = "Home", action = "Index", id = UrlParameter.Optional }
            );
        }
    }
}
ナビゲーション部分のタイトルをクリックしたら /Home/Index に遷移するように修正します。
Views/Shared/_Layout.cshtml
@{
ViewBag.ApplicationName = "薬品情報検索";
}
<!DOCTYPE html>
<html>
<head>
<meta charset="utf-8" />
<meta name="viewport" content="width=device-width, initial-scale=1.0">
<title>@ViewBag.Title - @ViewBag.ApplicationName</title>
<link href="~/Content/Site.css" rel="stylesheet" type="text/css" />
<link href="~/Content/bootstrap.min.css" rel="stylesheet" type="text/css" />
<script src="~/Scripts/modernizr-2.6.2.js"></script>
</head>
<body>
<div class="navbar navbar-inverse navbar-fixed-top">
<div class="container">
<div class="navbar-header">
<button type="button" class="navbar-toggle" data-toggle="collapse" data-target=".navbar-collapse">
<span class="icon-bar"></span>
<span class="icon-bar"></span>
<span class="icon-bar"></span>
</button>
@Html.ActionLink((string)ViewBag.ApplicationName, "Index", "Home", new { area = "" }, new { @class = "navbar-brand" })
</div>
<div class="navbar-collapse collapse">
<ul class="nav navbar-nav">
</ul>
</div>
</div>
</div>
<div class="container body-content">
@RenderBody()
<hr />
<footer>
<p>© @DateTime.Now.Year - @ViewBag.ApplicationName</p>
</footer>
</div>
<script src="~/Scripts/jquery-1.10.2.min.js"></script>
<script src="~/Scripts/bootstrap.min.js"></script>
</body>
</html>